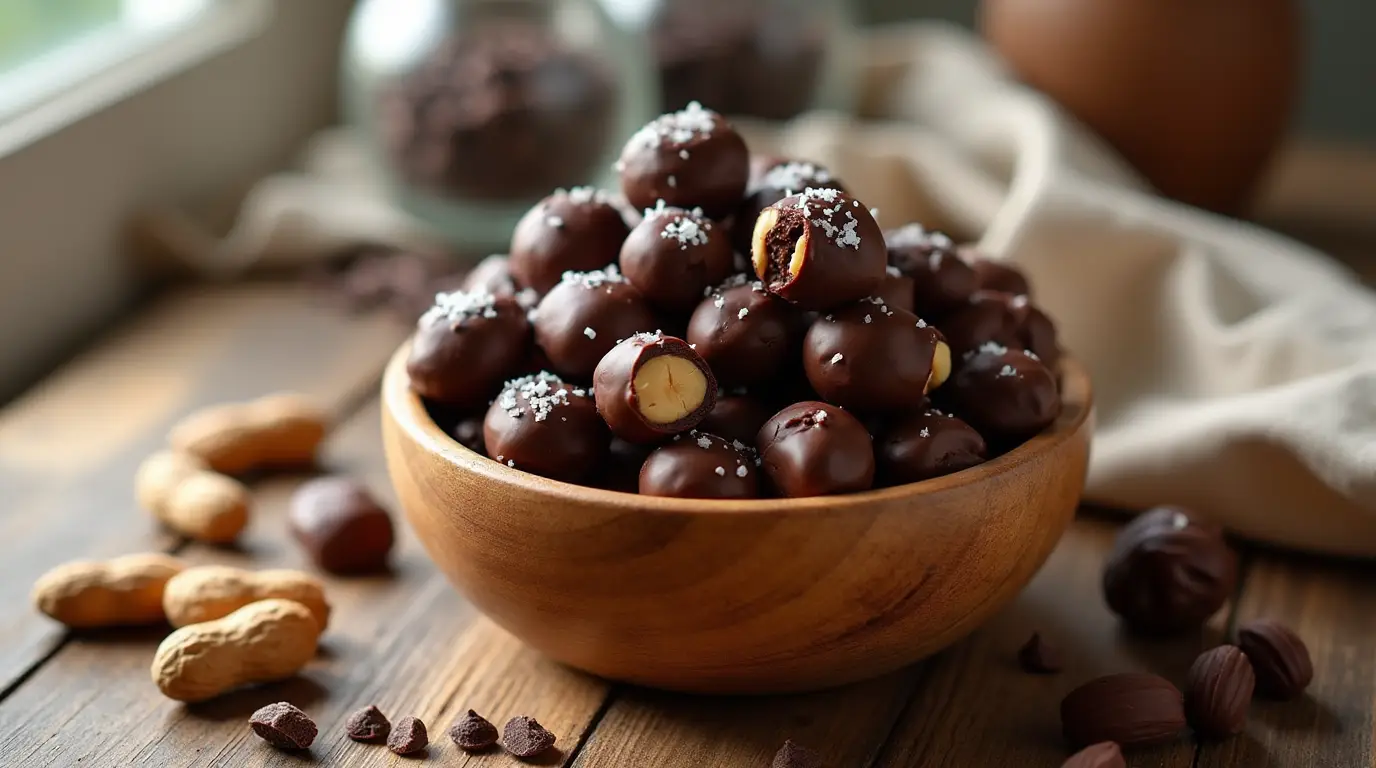
There’s something undeniably satisfying about the perfect balance of crunchy peanuts and smooth, rich chocolate. If you’re a fan of this delicious combination, then you’re in for a treat with this easy and extra tasty recipe for chocolate covered peanuts. Whether you’re looking for a simple snack to satisfy your sweet tooth or a homemade gift to share with friends, these treats are both a breeze to make and irresistibly good.
I’ve always loved chocolate and peanuts as a pairing, but what truly makes this recipe stand out is how quick and effortless it is. No complicated techniques, no hard-to-find ingredients—just a few pantry staples and you’ll have a batch of crunchy, chocolatey goodness ready to enjoy. Plus, making them at home means you can control the ingredients and avoid unnecessary additives, making them a healthier option compared to store-bought versions.
Whether you snack on them in between meals or sprinkle them on your favorite desserts, these chocolate-covered peanuts are sure to become a go-to treat. In just a few simple steps, you can enjoy the satisfying crunch of peanuts enveloped in creamy, melt-in-your-mouth chocolate. Let’s dive into how you can make these delightful snacks in no time!
Key Benefits of Chocolate Covered Peanuts Made Easy & Extra Tasty
- A Perfect Flavor Balance
The charm of chocolate-covered peanuts lies in the delightful contrast between crunchy, salty peanuts and smooth, sweet chocolate. This satisfying combination of textures and flavors turns a simple snack into a little moment of indulgence. It’s the ideal way to brighten any day with a quick, flavorful treat. - Nutrient-Dense Snack
Though they’re irresistibly tasty, chocolate-covered peanuts also pack a nutritional punch. Peanuts are a fantastic source of protein, healthy fats, and fiber, helping to keep you feeling full and energized. Just a small handful offers a satisfying snack that curbs hunger and boosts your mood. Opting for dark chocolate adds an extra layer of heart-healthy antioxidants. - Quick and Convenient
The best part? This recipe is incredibly quick and easy to make. There’s no need to spend hours in the kitchen. With minimal ingredients and preparation, you’ll have a batch of fresh, delicious chocolate-covered peanuts ready in no time. It’s the perfect snack for busy days or when unexpected guests drop by! - Customizable to Your Taste
Making these treats at home allows you to experiment with flavors and ingredients. Want to use dairy-free chocolate? Or perhaps add a sprinkle of sea salt to enhance the taste? The flexibility of this recipe lets you tailor it to your dietary preferences or flavor cravings, all while keeping the taste top-notch. - No Artificial Additives
When you make chocolate-covered peanuts yourself, you skip the preservatives and artificial flavors commonly found in store-bought options. You’ll know exactly what’s in your snack, ensuring a pure, delicious experience without any unnecessary extras.
This snack is more than just a treat—it’s a smart, satisfying choice that blends flavor, nutrition, and ease. What’s not to love?
Ingredients for Chocolate Covered Peanuts Made Easy & Extra Tasty
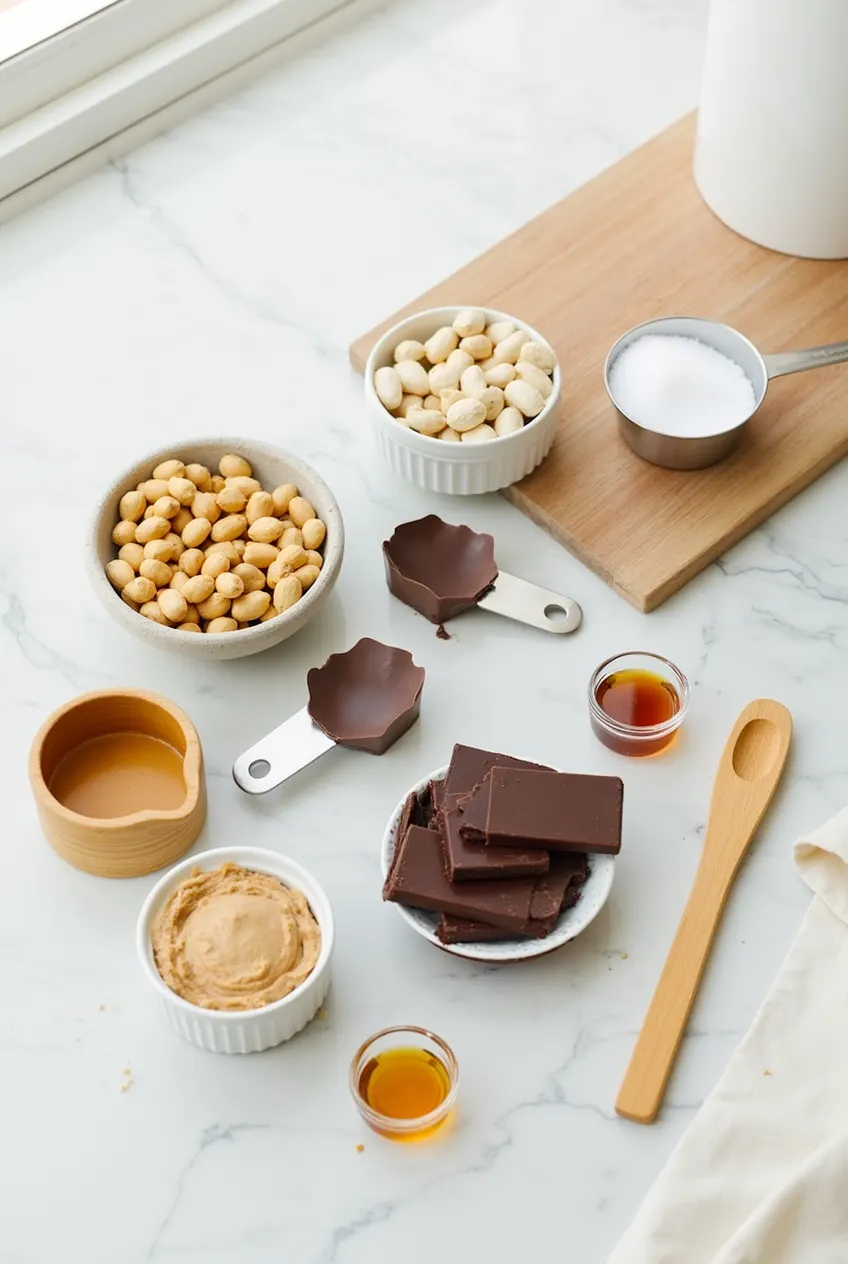
To create the perfect batch of chocolate-covered peanuts, you’ll need just a few simple ingredients. Here’s what to gather, along with some tips to make the most of them:
- Peanuts (1 cup)
Use unsalted, dry-roasted peanuts for the best crunch and flavor. You can opt for salted peanuts if you like a bit of contrast, but keep in mind it will affect the overall flavor balance. - Chocolate (1 cup)
Dark or milk chocolate works beautifully, depending on your preference. For a healthier twist, go with 70% dark chocolate, which adds richness and antioxidants. If you’re dairy-free, use a high-quality dairy-free chocolate. - Coconut Oil or Vegetable Oil (1 tbsp)
A small amount of oil helps the chocolate melt smoothly and coat the peanuts evenly. Coconut oil adds a subtle flavor, but vegetable oil is a neutral choice if you prefer to keep the chocolate flavor pure. - Optional: Sea Salt (a pinch)
If you love that sweet-and-salty combo, a light sprinkle of sea salt on top will enhance the flavor and give the peanuts an extra touch of sophistication.
This simple ingredient list makes it easy to adjust quantities, depending on how many people you’re serving. Just keep the peanut-to-chocolate ratio consistent, and you’re all set!
Tools & Equipment Needed
To prepare your chocolate-covered peanuts, you’ll need a few essential kitchen tools:
- Double Boiler or Heavy-Bottomed Pan: A double boiler is ideal for melting chocolate without burning it. If you don’t have one, a heavy-bottomed pan works as well, but be sure to melt the chocolate on low heat to prevent scorching.
- Whisk or Spoon: You’ll need a whisk or spoon to stir the chocolate as it melts, ensuring it stays smooth and even.
- Measuring Cups & Spoons: Accurate measurements are key to achieving the perfect chocolate coating and balance of sweetness.
- Baking Sheet or Tray: A baking sheet lined with parchment paper or wax paper is perfect for spreading out the coated peanuts while they set. It prevents sticking and makes cleanup easier.
These simple tools will make your chocolate-covered peanuts a breeze to prepare!
Instructions for Chocolate Covered Peanuts
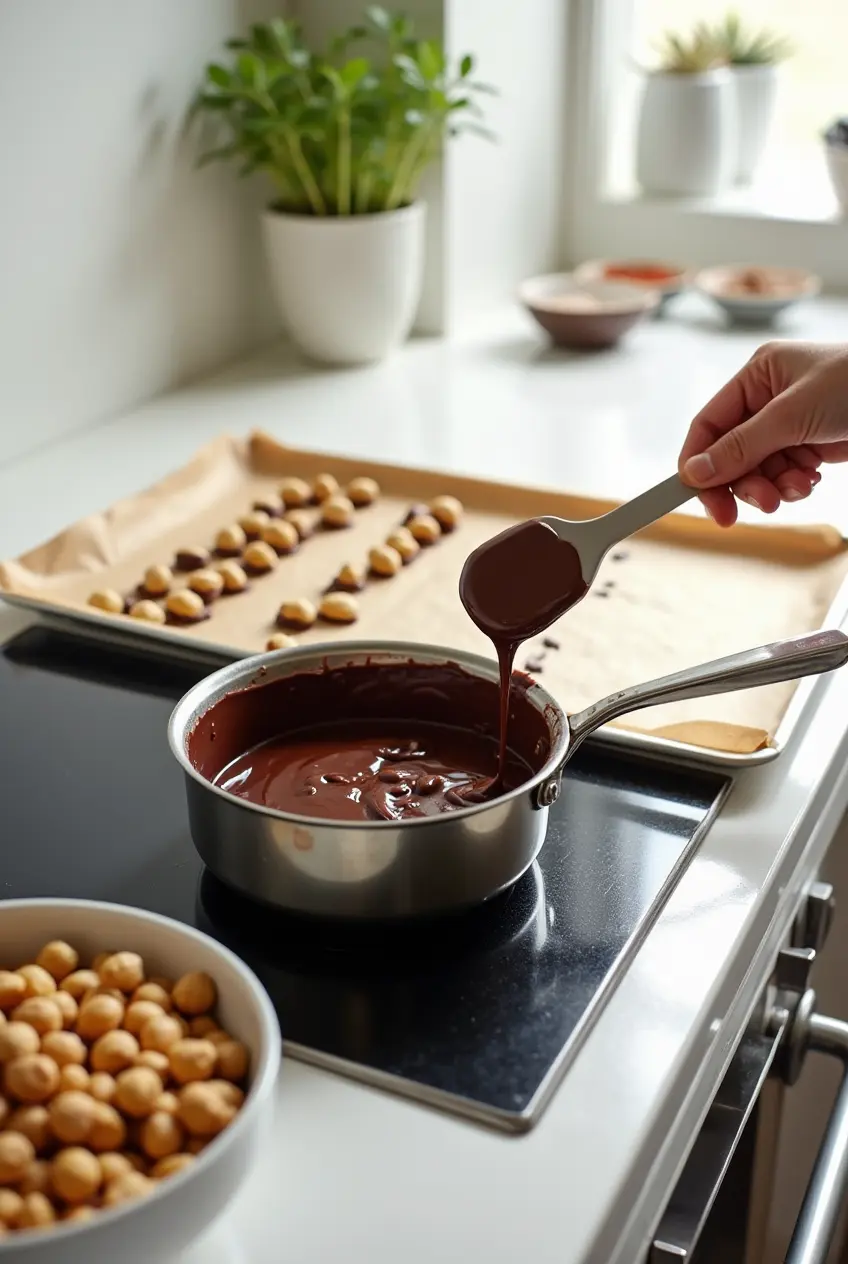
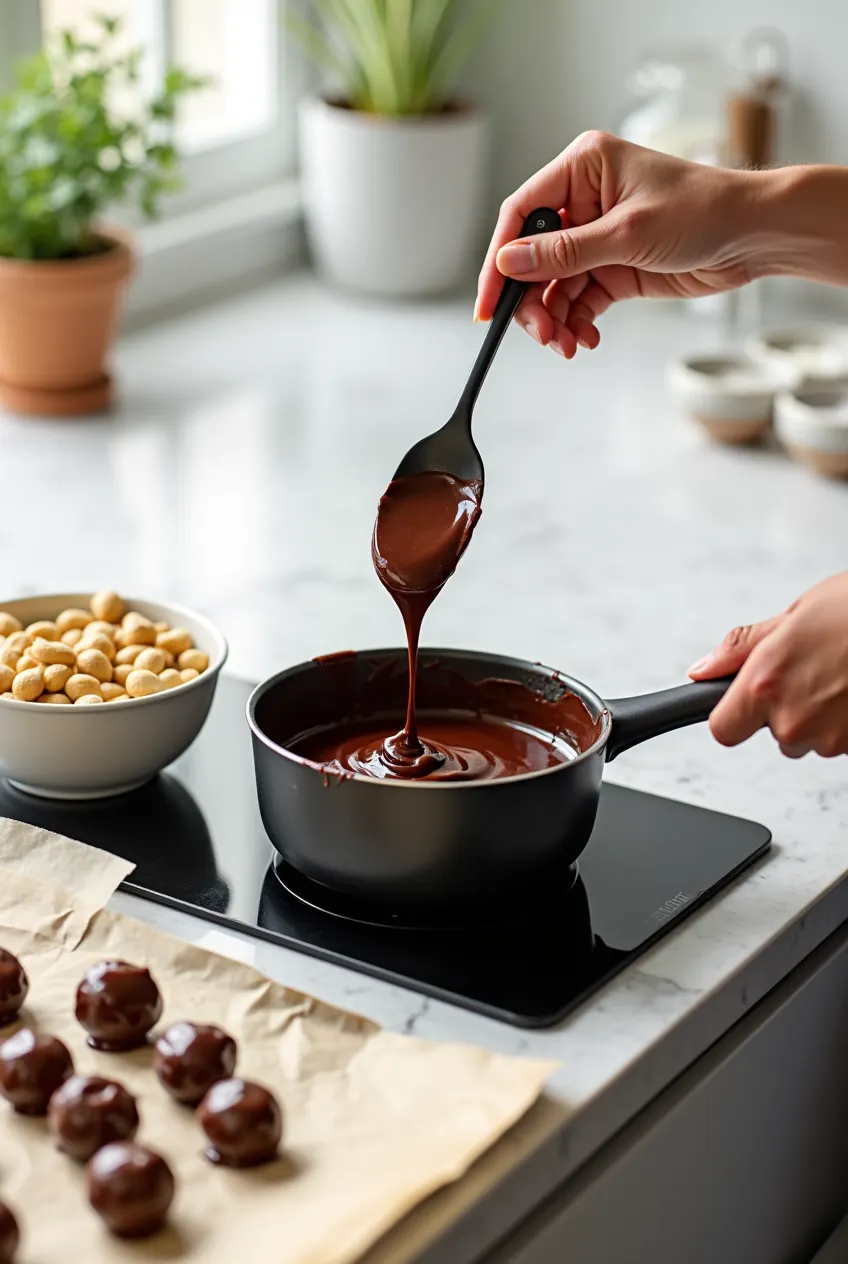
Follow these simple steps to make your own chocolate-covered peanuts—it’s easier than you think, and the result is incredibly rewarding!
1. Prep Your Ingredients
Start by gathering all your ingredients. If you’re using whole peanuts, you may want to give them a quick chop into smaller pieces for more bite-sized treats. Set aside your chocolate, peanuts, and any optional ingredients like sea salt.
2. Melt the Chocolate
In a medium saucepan, place your chocolate and coconut or vegetable oil over low heat. Stir frequently as the chocolate begins to melt, making sure it doesn’t burn. If you prefer, you can melt the chocolate in a microwave-safe bowl in 30-second intervals, stirring between each. Keep an eye on it—chocolate can burn easily!
Tip: If the chocolate feels too thick, add a bit more oil, one teaspoon at a time, to achieve the desired consistency. A smooth, glossy texture is ideal for coating the peanuts evenly.
3. Coat the Peanuts
Once the chocolate is fully melted, pour the peanuts into the bowl with the chocolate. Stir gently but thoroughly, making sure every peanut is coated. If you prefer a lighter coating, use a slotted spoon to remove the peanuts from the chocolate, letting excess chocolate drip off.
4. Chill for the Perfect Finish
Line a baking sheet with parchment paper. Spread the coated peanuts in a single layer on the sheet, ensuring they don’t stick together. Refrigerate for about 15–20 minutes or until the chocolate is set and firm to the touch.
Tip: For extra crunch, you can sprinkle a pinch of sea salt over the peanuts just before placing them in the fridge.
5. Serve or Store
Once the chocolate is fully hardened, your chocolate-covered peanuts are ready to serve! Transfer them to a bowl or jar, or enjoy them straight from the fridge. They’re the perfect snack for a movie night, a party, or a midday pick-me-up.
Tip: If you have any leftovers, store them in an airtight container in the fridge for up to two weeks. They’ll stay fresh and delicious!
6. Optional Variations
Feel free to add a touch of creativity! For a caramelized twist, try tossing the peanuts in a bit of honey or maple syrup before coating them in chocolate. For a nutty boost, consider sprinkling chopped almonds or cashews onto the chocolate-coated peanuts before chilling.
This easy recipe guarantees a delightful treat that’s both satisfying and simple to prepare. Enjoy your chocolate-covered peanuts—perfect for sharing or snacking!
Common Mistakes & Troubleshooting
While making chocolate-covered peanuts is straightforward, there are a few common pitfalls to watch out for:
- Burning the Chocolate: Chocolate can easily burn if overheated. Always melt it on low heat, either in a double boiler or using the microwave in 20-second bursts, stirring in between. Quick Fix: If your chocolate seizes up (gets lumpy or grainy), add a small amount of coconut oil or milk and gently reheat it.
- Peanuts Not Coated Evenly: If the peanuts aren’t evenly coated, it’s likely the chocolate was too thick. Quick Fix: If needed, add a touch more melted chocolate or a teaspoon of coconut oil to thin it out for better coverage.
- Chocolate Not Setting Properly: If your chocolate isn’t hardening or is too soft, it could be due to the peanuts being too warm when coated. Quick Fix: Ensure the peanuts are completely cooled before dipping, and place the tray in the fridge to help the chocolate firm up faster.
Pro Tips and Variations
Want to elevate your chocolate-covered peanuts even more? Here are some creative tips and flavor variations to make this recipe your own. Whether you’re aiming for a richer taste or a lighter version, you’ve got plenty of options!
1. Add a Hint of Spice
For a sweet-and-spicy twist, add a pinch of ground cayenne pepper or chili powder to the melted chocolate. This adds warmth and depth without overwhelming the flavor. You can adjust the spice level to your liking, but a small amount goes a long way! Alternatively, for a smoky touch, try adding a bit of smoked paprika.
2. Go Vegan-Friendly
If you’re following a plant-based diet, simply swap the regular chocolate for a high-quality vegan chocolate. There are many delicious options available today, often made with coconut milk or almond milk for a creamy texture. Coconut oil works perfectly for this variation, adding a subtle tropical flavor that complements the chocolate.
3. Experiment with Different Nuts
Peanuts are the classic choice, but you can easily switch things up. Try using almonds for a hearty, crunchy texture or cashews for a smooth, buttery bite. Keep in mind that different nuts will slightly alter the flavor, but they all pair beautifully with chocolate.
4. Add Sweeteners for Extra Flavor
For a more indulgent treat, drizzle a bit of honey or maple syrup over the peanuts before coating them in chocolate. This can add an extra layer of sweetness and bring out the natural flavors of the nuts. If you’re reducing sugar, you can also use stevia or monk fruit sweeteners.
5. Boost the Texture with Sea Salt or Coconut
To enhance the texture and flavor, sprinkle a pinch of flaky sea salt or toasted coconut flakes over the chocolate-coated peanuts before chilling them. The salt balances the sweetness and intensifies the chocolate flavor, while coconut adds a lovely crunch and tropical aroma.
6. Make Them Nut-Free
If you or someone you’re serving has a nut allergy, you can still enjoy this recipe by using seeds like sunflower or pumpkin seeds. The texture will be slightly different, but the chocolate coating will still deliver a delicious treat.
7. Chill for Different Textures
For a soft, melt-in-your-mouth experience, chill the peanuts for only 10–15 minutes. For a firmer, crunchier coating, let them cool in the fridge for a longer period (about 30 minutes). Adjust the chilling time based on your preferred texture!
These simple variations give you endless possibilities to make chocolate-covered peanuts a treat that’s truly tailored to your tastes. Whether you want a spicy kick, a vegan version, or a twist with different nuts, these tips will help you create a deliciously unique snack every time!
How to Store and Reheat
Storing Chocolate Covered Peanuts
To keep your chocolate-covered peanuts fresh and flavorful, proper storage is key.
- Cool before storing: After coating the peanuts with chocolate, allow them to cool at room temperature for 15-20 minutes. This helps the chocolate harden fully and avoids any condensation inside the container, which could affect the texture.
- Use airtight containers: Once cooled, place your peanuts in an airtight container. A well-sealed plastic or glass container will preserve their freshness and prevent the chocolate from picking up any unwanted odors.
- Refrigerate or freeze: For optimal freshness, store the peanuts in the fridge where they’ll stay good for up to two weeks. If you want to keep them longer, freeze them for up to 2 months. Just make sure to use a freezer-safe container or wrap them tightly in plastic wrap and foil to avoid freezer burn.
Reheating Chocolate Covered Peanuts
Chocolate-covered peanuts are typically best enjoyed chilled or at room temperature, but if you prefer a slightly softer chocolate texture, here’s how to reheat them:
- Microwave: Place the peanuts on a microwave-safe plate and heat them in 10-15 second intervals. Stir gently between each interval until the chocolate begins to soften.
- Oven: Preheat your oven to 300°F (150°C), spread the peanuts in a single layer on a baking sheet, and heat for 5-10 minutes. Keep a close eye on them to ensure the chocolate doesn’t melt too much.
Safety Tip:
Once reheated, avoid heating the peanuts again. Repeated reheating can negatively impact the chocolate’s texture and may compromise the safety of the snack.
By following these easy steps for storing and reheating, you can enjoy your chocolate-covered peanuts fresh and delicious for days!
Substitutions
Whether you’re looking to make your chocolate-covered peanuts a bit healthier, accommodate dietary restrictions, or simply swap out ingredients, there are plenty of options. Here are a few ideas to personalize your treat!
1. Chocolate Substitutes
- Dairy-Free Chocolate: If you’re avoiding dairy, go for high-quality dairy-free chocolate. Dark chocolate with at least 70% cocoa is a great choice and adds a rich, bittersweet flavor to balance the peanuts.
- Cocoa Powder & Sweetener: For a lighter option, melt cocoa powder with a little coconut oil and a sweetener like stevia or maple syrup. This creates a healthier, sugar-free coating.
2. Nuts Substitutes
- Almonds or Cashews: If you’re not a fan of peanuts or want to change the texture, almonds or cashews make excellent alternatives. Almonds provide a firmer bite, while cashews offer a buttery smoothness.
- Seeds: If you need a nut-free option, try sunflower seeds or pumpkin seeds. These seeds provide a crunchy texture similar to peanuts and work well with the chocolate coating.
3. Sweetener Alternatives
- Maple Syrup or Honey: Want to reduce refined sugar? Swap in maple syrup or honey for a natural sweetness. Both add a unique flavor—maple syrup brings a warm, earthy taste, while honey adds a smooth sweetness.
- Coconut Sugar: For a lower glycemic option, use coconut sugar. It adds a slightly caramel-like taste, which can enhance the chocolate’s richness.
4. Oil Substitutes
- Coconut Oil: If you prefer a tropical twist, coconut oil is a fantastic choice. It not only helps the chocolate melt smoothly but also imparts a slight coconut flavor that pairs beautifully with the peanuts.
- Vegetable Oil: If you want a more neutral flavor, vegetable oil works just as well to help the chocolate melt and coat the peanuts.
Each of these swaps will slightly alter the texture or flavor of your chocolate-covered peanuts, but the results will still be deliciously satisfying! Feel free to experiment and find the perfect combination for your taste preferences and dietary needs.
Serving Suggestions
If you’re looking to serve your chocolate-covered peanuts in a way that makes them even more irresistible, here are a few ideas to elevate your treat:
1. Pair with Fresh Fruit
Chocolate and fruit are a match made in heaven! Serve your peanuts alongside sliced strawberries, raspberries, or a handful of blueberries. The tangy sweetness of the fruit perfectly balances the richness of the chocolate coating.
2. Add to a Nutty Snack Board
Create a delightful snack board by combining your chocolate-covered peanuts with other nuts, dried fruits, and cheeses. Think almonds, cashews, figs, and a mild goat cheese—this adds variety and texture to the plate while keeping the focus on the peanuts.
3. Plating Tip: Keep It Simple
For a restaurant-worthy presentation, sprinkle a few chocolate-covered peanuts onto a small, elegant plate. You can also dust the edges with powdered sugar or cocoa powder for a refined touch. Serve in small bowls or even wine glasses for a fun, creative presentation.
4. Pair with a Light Drink
For something refreshing to go with your chocolate peanuts, a nice glass of cold iced tea or sparkling water with lemon can be a great choice. The slight acidity and carbonation will cut through the sweetness and complement the rich chocolate.
5. Enjoy with a Balanced Salad
If you’re serving them as part of a larger meal, pair the peanuts with a crisp, light salad. A simple mixed greens salad with lemon vinaigrette works wonders to balance the richness of the chocolate-covered peanuts.
Feel free to get creative and experiment! If you try any of these ideas or come up with your own, be sure to share your plating photos or favorite pairings with us.
Conclusion
Making chocolate-covered peanuts at home is not only easy but also incredibly rewarding. With just a few simple ingredients, you can create a treat that’s both sweet and crunchy, with plenty of opportunities for customization. Whether you go for dark chocolate, a sprinkle of sea salt, or a handful of your favorite nuts, this recipe is as versatile as it is delicious.
Key Takeaways:
- Quick and simple to prepare with minimal ingredients.
- Customizable to suit various dietary needs (vegan, nut-free, etc.).
- Perfect for snacks, parties, or a sweet treat anytime.
So why not give it a try? The next time you’re craving something sweet, this is the perfect recipe to satisfy your taste buds. Share your experience in the comments or tag us on social media with your creative twists. Happy cooking!
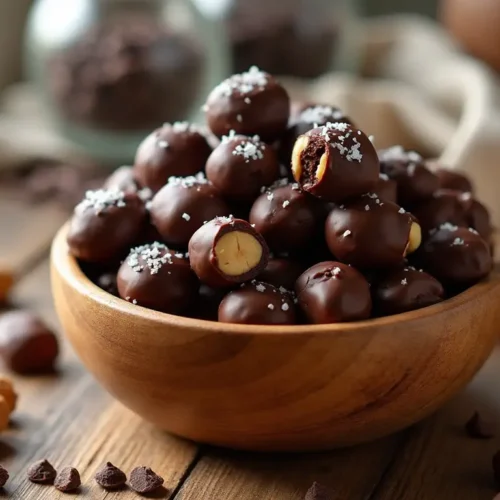
Chocolate Covered Peanuts
Ingredients
- create the perfect batch of chocolate-covered peanuts you’ll need just a few simple ingredients. Here’s what to gather, along with some tips to make the most of them:
Peanuts (1 cup)
- Use unsalted dry-roasted peanuts for the best crunch and flavor. You can opt for salted peanuts if you like a bit of contrast, but keep in mind it will affect the overall flavor balance.
Chocolate (1 cup)
- Dark or milk chocolate works beautifully depending on your preference. For a healthier twist, go with 70% dark chocolate, which adds richness and antioxidants. If you’re dairy-free, use a high-quality dairy-free chocolate.
Coconut Oil or Vegetable Oil (1 tbsp)
- A small amount of oil helps the chocolate melt smoothly and coat the peanuts evenly. Coconut oil adds a subtle flavor but vegetable oil is a neutral choice if you prefer to keep the chocolate flavor pure.
Optional: Sea Salt (a pinch)
- If you love that sweet-and-salty combo a light sprinkle of sea salt on top will enhance the flavor and give the peanuts an extra touch of sophistication.
Instructions
- Follow these simple steps to make your own chocolate-covered peanuts—it’s easier than you think, and the result is incredibly rewarding!
Prep Your Ingredients
- Start by gathering all your ingredients. If you’re using whole peanuts, you may want to give them a quick chop into smaller pieces for more bite-sized treats. Set aside your chocolate, peanuts, and any optional ingredients like sea salt.
Melt the Chocolate
- In a medium saucepan, place your chocolate and coconut or vegetable oil over low heat. Stir frequently as the chocolate begins to melt, making sure it doesn’t burn. If you prefer, you can melt the chocolate in a microwave-safe bowl in 30-second intervals, stirring between each. Keep an eye on it—chocolate can burn easily!
- Tip: If the chocolate feels too thick, add a bit more oil, one teaspoon at a time, to achieve the desired consistency. A smooth, glossy texture is ideal for coating the peanuts evenly.
Coat the Peanuts
- Once the chocolate is fully melted, pour the peanuts into the bowl with the chocolate. Stir gently but thoroughly, making sure every peanut is coated. If you prefer a lighter coating, use a slotted spoon to remove the peanuts from the chocolate, letting excess chocolate drip off.
Chill for the Perfect Finish
- Line a baking sheet with parchment paper. Spread the coated peanuts in a single layer on the sheet, ensuring they don’t stick together. Refrigerate for about 15–20 minutes or until the chocolate is set and firm to the touch.
- Tip: For extra crunch, you can sprinkle a pinch of sea salt over the peanuts just before placing them in the fridge.
Serve or Store
- Once the chocolate is fully hardened, your chocolate-covered peanuts are ready to serve! Transfer them to a bowl or jar, or enjoy them straight from the fridge. They’re the perfect snack for a movie night, a party, or a midday pick-me-up.
- Tip: If you have any leftovers, store them in an airtight container in the fridge for up to two weeks. They’ll stay fresh and delicious!
Optional Variations
- Feel free to add a touch of creativity! For a caramelized twist, try tossing the peanuts in a bit of honey or maple syrup before coating them in chocolate. For a nutty boost, consider sprinkling chopped almonds or cashews onto the chocolate-coated peanuts before chilling.
Notes
- Calories: 200–250 kcal
- Fat: 14–16g
- Saturated Fat: 3–4g
- Protein: 6–7g
- Carbohydrates: 18–22g
- Sugar: 15–18g
- Fiber: 2–3g
- Iron: 1–2mg
- Magnesium: 40–50mg
- Calcium: 10–15mg (depends on chocolate type)
Cultural/Regional Trivia
While chocolate-covered peanuts themselves aren’t tied to a specific culture, chocolate has deep roots in many regions, particularly in Mesoamerica. The ancient Maya and Aztec civilizations were some of the first to cultivate cacao, using it in drinks and rituals. It wasn’t until chocolate made its way to Europe in the 16th century that it was transformed into the sweet treat we enjoy today.
Chocolate-covered peanuts, as we know them, became popular in the United States in the early 20th century as part of the candy-coated nut trend. Today, they are a beloved snack around the world, from casual parties to gourmet gift boxes.
This treat showcases the perfect harmony between two simple ingredients—nuts and chocolate—making it a timeless snack enjoyed across cultures.
FAQs:
Q1: Can I use milk chocolate instead of dark chocolate?
Yes, you can absolutely use milk chocolate! Milk chocolate will create a sweeter, creamier coating for your peanuts compared to dark chocolate, which has a more bitter taste. It’s all about personal preference, so feel free to experiment with what you enjoy most!
Q2: How long do chocolate-covered peanuts last?
When stored in an airtight container, chocolate-covered peanuts will stay fresh in the refrigerator for up to 2 weeks. If you want to extend their shelf life, you can freeze them for up to 2 months. Just make sure to store them properly in a freezer-safe container to avoid freezer burn.
Q3: Can I make this recipe nut-free?
Yes! You can replace the peanuts with other seeds like sunflower or pumpkin seeds if you’re avoiding nuts. These seeds provide a similar texture and a nice crunch, while still giving you that satisfying chocolate coating.
Q4: How do I store chocolate-covered peanuts?
Store your chocolate-covered peanuts in an airtight container in the fridge to keep them fresh. If freezing, place them in a freezer-safe bag or container. Make sure the peanuts are completely cooled before storing them to avoid any condensation inside the container.
Q5: Can I make chocolate-covered peanuts ahead of time?
Absolutely! These are great for making in advance. They hold up well in the fridge for several days, so you can prepare them ahead of time for parties, gatherings, or just a week’s worth of snacking.
Q6: Can I add other toppings or mix-ins?
Yes, you can customize your chocolate-covered peanuts by adding toppings like a sprinkle of sea salt, shredded coconut, or even a drizzle of caramel. Get creative with your mix-ins, such as chopped almonds, or even a pinch of cinnamon for a warm flavor boost.
Q7: How do I reheat chocolate-covered peanuts if they’ve softened?
Chocolate-covered peanuts don’t usually need to be reheated, but if they’ve softened from storage, you can place them in the fridge to firm up. If you’d prefer a softer texture, you can heat them gently in the microwave for about 10-15 seconds.
Feel free to leave any additional questions in the comments, or share your own tips and variations!
Nutritional Information
Here’s a quick look at the approximate nutritional breakdown for chocolate-covered peanuts per serving (about 10–12 pieces):
- Calories: 200–250 kcal
- Protein: 6–7g
- Carbohydrates: 18–22g
- Sugar: 15–18g
- Fat: 14–16g
- Saturated Fat: 3–4g
- Fiber: 2–3g
- Vitamins/Minerals:
- Iron: 1–2mg
- Magnesium: 40–50mg
Note: These values can vary depending on the type of chocolate used and the size of the portion.
For a lower-fat option, consider using a reduced-fat chocolate or opt for a sugar-free sweetener to cut down on carbs. If you’re aiming for a vegan-friendly version, replace milk chocolate with a dairy-free alternative and use coconut oil instead of butter.
Remember, nutritional content will change depending on ingredient brands, so always check the labels for the most accurate information.

